Tutorial: How To Make a Cube Roll On A Grid in Unreal Engine 4
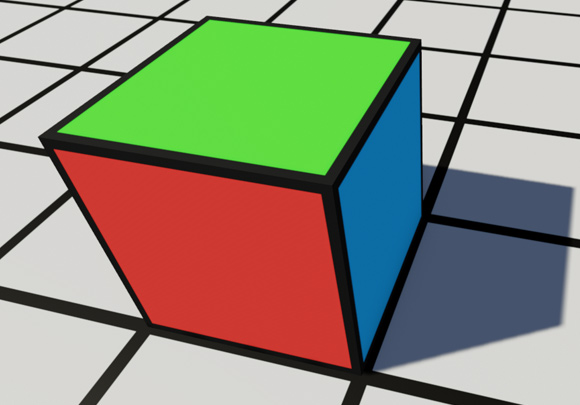
In this tutorial, I will show how to make a cube roll from side-to-side on a grid. This project took me around 3 days to complete, though much of that was wrapping my head around basic things in UE4. Some of the areas explored here include setting up key bindings and action mapping, setting and clearing timers, and rotating around an arbitrary point.
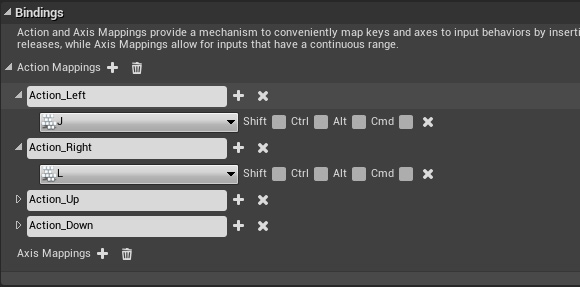
First, you want to start by setting up the action mapping. What this does is basically binds an input button (like a keyboard key) to a particular action (really just a name that you make up). For this test I needed 4 keys for up, down, left and right. Since the arrow keys and WASD were already used by the default Unreal fly camera, I choose to employ the IJKL keys to move the cube around. These options are found in “Settings->Project Settings->Engine->Input->Bindings”.
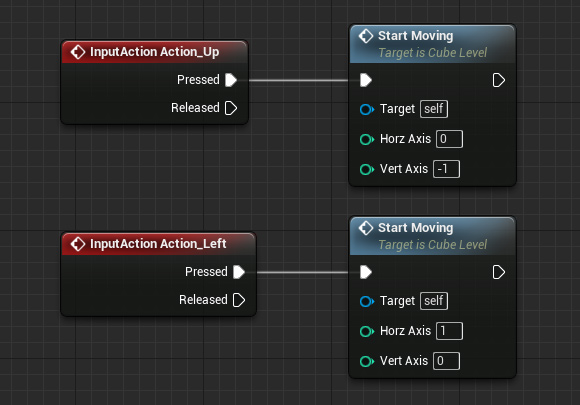
Next, we will need to connect those actions to a function in order to make something happen on the screen. You can do this by creating an “InputAction” Blueprint and choosing the name you created (like “Action_Up”). I set these actions to call a function I created for this example called “StartMoving”. In some cases, you may want to bind the action to a custom event, which may simplify the code and allow for a cleaner Blueprint (as you can use events to effectively “jump” to other points in the same Blueprint without a line connecting them). In this case, I had to pass in some state (to know which direction the cube is moving) so using a function was better suited for the job.
The “StartMoving” function is not that complex. All it does it check first if the timer is active (to avoid registering input while the cube is already moving), save some state on the cube itself (the direction of movement and it’s last position), and then creates a timer to handle the animation.
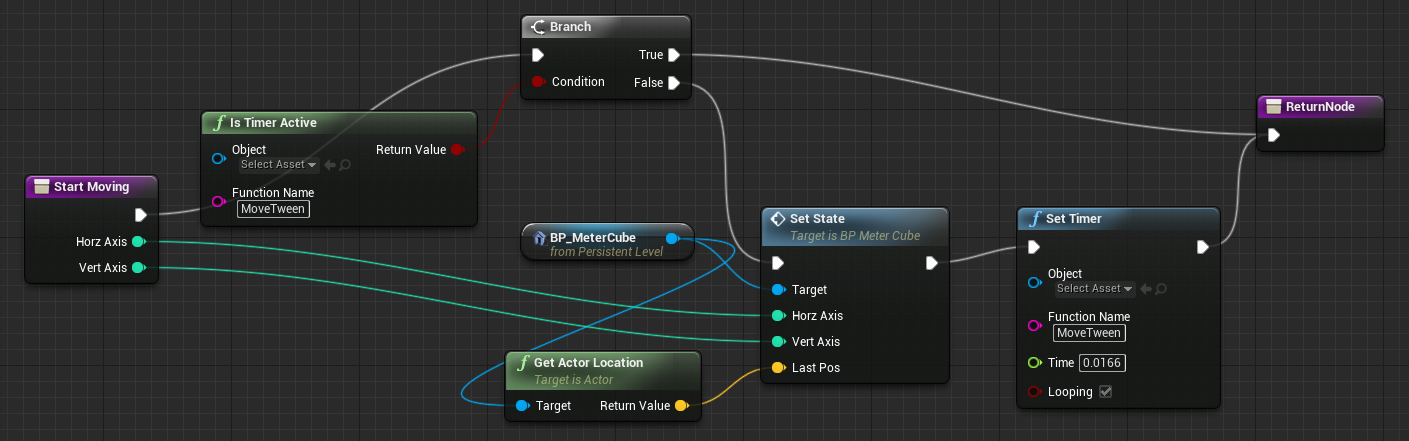
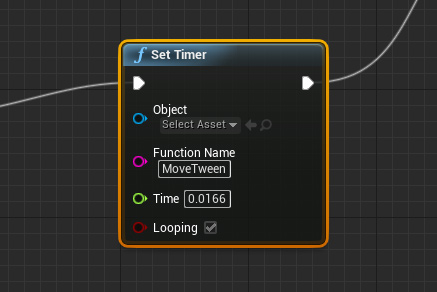
The key part is the creation of the timer itself, using “SetTimer”, which is shown below. You can think of a timer as spawning another process or thread that can run concurrently with your main logic. The timer just calls a function of your choice (“MoveTween” in this example), at a specified time interval (use 0.0166 for a 60Hz animation cycle, which looks smooth enough). You can also set whether it loops or not, we use looping in this case.
Finally, we have the “MoveTween” function, which is what is called by the timer and what does all the math calculation to rotate around a particular axis and point in space. It’s also what animates the cube, and clears the timer at the end itself. It’s very useful to be able to spawn a timer, and then have it terminate itself when necessary. The full function is shown below.
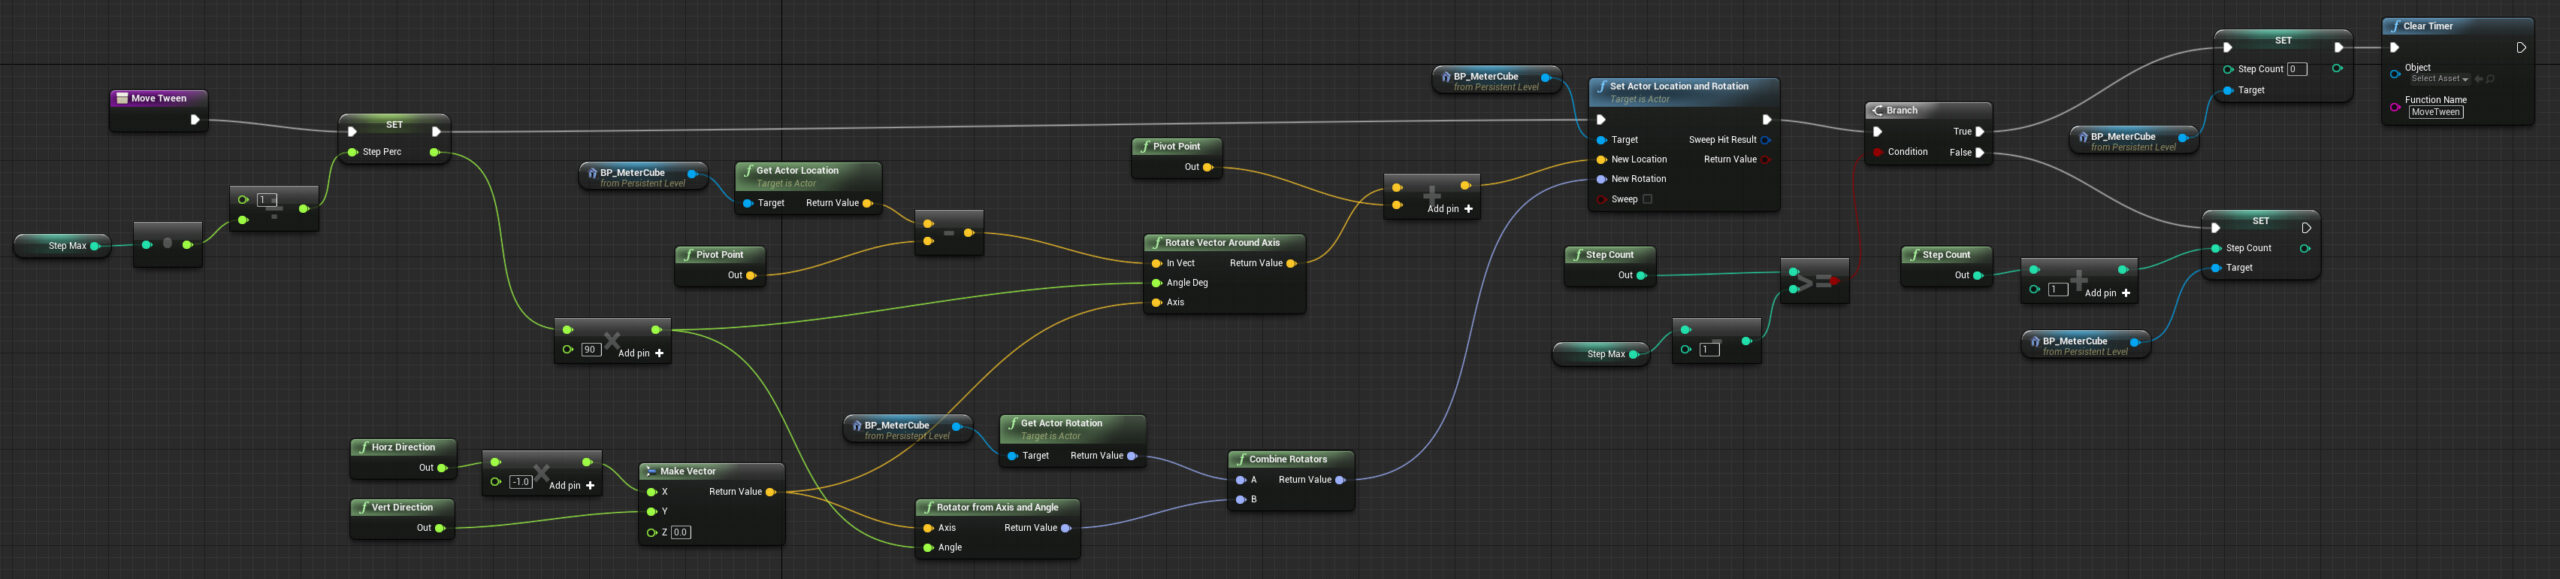
Really, the core math of the method is done by two function included in UE4, “RotateVectorAroundAxis” and “RotatorFromAxisAngle”. We first create a axis based on the movement direction. Then we subtract the pivot point (in our case, the bottom edge of the cube), rotate around that axis, and then add the pivot point back to the location. The rotation around axis logic is actually based on an example shown on the Unreal Answer Hub, though it was modified to fit my purpose.
And that is basically it. I’ve even included the full project file below for you to download and experiment. I imagine this type of motion could be used for a type of puzzle game created in Unreal Engine 4. Download Link: UE4.7.4 Cube Motion Project Files