Tutorial: How To Make a Textured Spinning Cube Using Unreal Engine 4
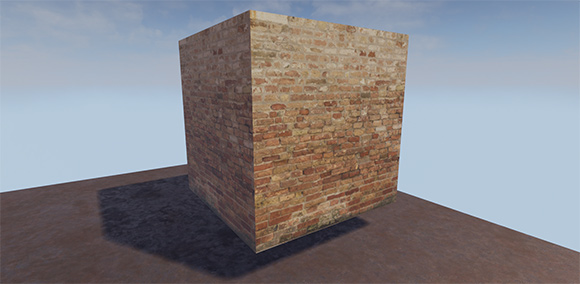
Today I will show how to create a textured spinning cube using Unreal Engine 4. Making a cube spin is basically what I consider the “litmus test” of 3D engines. How long it takes you to figure this out will show how convenient or capable the engine is. While I might have skipped this test (by jumping straight into creating Pong) I thought it was worthwhile to go back and try it. Hopefully this tutorial will be helpful to some of you just getting started.
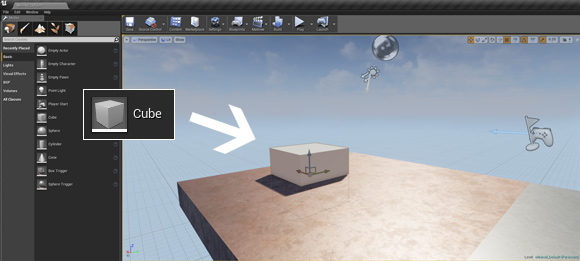
First thing you should do is create a new blank project. I chose to make the project with the starter content (and deleting the furniture) however that won’t be important for this guide. Next look on the left-hand panel, make sure you are in place mode (the icon with the cube), and look under basic and find Cube. Now drag the cube into the scene. It will probably start inside the floor, so just press Q to go into move mode and then drag it up a little.
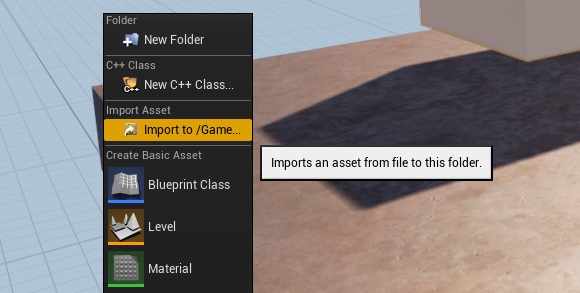
Since looking at a gray model is not that exciting, lets add some texture. In the Content Browser on the bottom, right-click in the empty area and select “Import to /Game…”. Then find your image file and press Open.
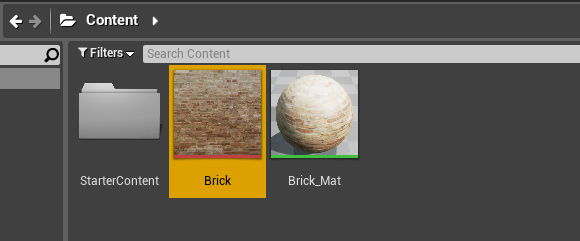
You should see the new texture appear in the browser. Now drag this texture onto the cube model. You’ll see this automatically create a default material for you. With the cube still selected, click “Movable” in the Details panel on the right.
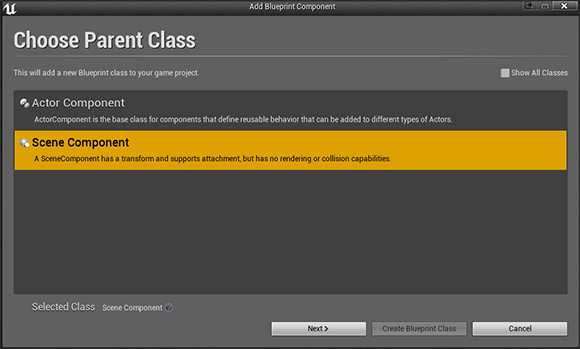
The next step is to create the component Blueprint. You can do this by clicking the green “+Add Component” button on the top of the Details panel. Choose “New Blueprint Script Component”. In the pop-up window, pick Scene Component, click Next, type a name in, then click “Create Blueprint Class”.
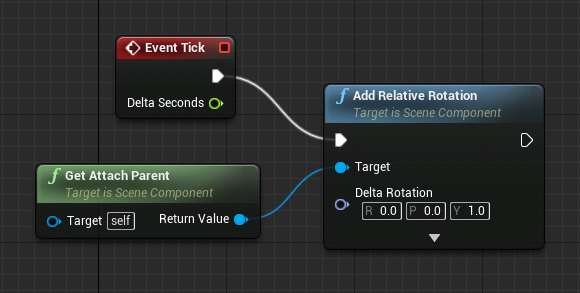
In the new Blueprint window, you can delete the “Event Initialize Component” (though you can also leave it alone, won’t matter in this case). Pull off the output execution pin on “Event Tick” (it’s the white arrow looking thing on the upper-right). You should see a menu open. Start typing “rotation” and then pick “Add Relative Rotation”. In the Y field for “Delta Rotation” type in “1” and press Enter. Pull off the “Target” pin and type “parent” then click “Get Attach Parent”. Now you can save and compile the script.
Switch back to the main editor window and press “Play”. That’s it! Hopefully this tutorial was useful to some people (please let me know in the comments). I plan to produce more of these in the future, and they should gradually get more complex as I get more familiar with the engine.
It’s really quite amazing how quick and easy it is to work with Unreal. Using straight C++ and DirectX, one would be lucky to make a textured spinning cube in 2 hours, let alone 2 minutes. It really speaks to the robustness of the engine. Of course, I still have a long way to go in terms of learning the engine, so please follow me on this journey (and pray I don’t give up on this one).
